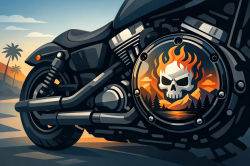
Your primary cover is not background metal. It is one of the first places people look when they walk up to your bike. A custom Harley derby cover turns that blank, factory-finished circle into a piece of your story - your colors, your creed, your logo, your attitude.
That is the difference between bolting on another off-the-shelf accessory and building a motorcycle that does not look like it rolled out of a dealership lineup. Whether your ride calls for an American flag, a hard-edged skull, military tribute, old-school pinup, memorial photo, club artwork, or something nobody else has thought to run, the right derby cover can set your ride off without changing the soul of the bike.
Why a Custom Harley Derby Cover Hits Different
A derby cover is a small part with a big visual job. It sits low on the primary, but its location makes it impossible to ignore. On a blacked-out bagger, a bright full-coverage image creates a hard focal point. On a chrome-heavy cruiser, it gives the eye something personal to land on. On a stripped-down Sportster, it can become the loudest detail on the whole machine.
The best part is that this kind of customization does not require tearing your bike apart. You are not changing your motor, chasing a major paint job, or committing to a full rebuild. You are choosing a precision-made part that changes the visual message of your Harley in one clean move.
Generic accessories have their place, but they rarely say much. A custom piece does. It can honor someone you ride for, put your business logo on the road, represent your service, match your bike's paint, or simply show the world that your motorcycle belongs to you and nobody else.
Fitment Comes Before Artwork
The image gets the attention. Fitment gets the part onto the bike correctly. Before selecting artwork, know exactly what Harley platform you own, including the year, engine family, and cover style required.
Harley-Davidson primary setups are not one-size-fits-all. Big Twin, Twin Cam, Milwaukee-Eight, and 883/1200 Sportster models can use different derby cover sizes, bolt patterns, and profiles. Even two bikes that look similar from ten feet away may not take the same cover. Guessing because a part "looks close" is how riders end up with an expensive garage-wall decoration.
Start with the information on your registration or VIN lookup, then confirm the model year and engine platform. If you have already changed the primary cover or installed an aftermarket setup, inspect the cover currently on the bike instead of relying only on factory specifications. Custom builds deserve an extra minute of checking.
A properly selected cover should sit cleanly, align with the mounting holes, and work with the correct gasket and hardware for your application. Do not force bolts into alignment. Do not reuse a damaged gasket just because it was there. A killer design is worthless if the installation creates a leak or damages threads in the primary.
Stock Shape or a Different Finish?
The finish you choose should work with the rest of your motorcycle, not compete with it by accident. Black finishes bring a darker, more aggressive look and let bold graphics punch hard. Chrome or polished-style looks can work beautifully with traditional custom builds, especially when the bike already carries bright metal across the engine and controls.
There is no universal right answer. A reaper graphic may look meaner against black. A patriotic flag can pop against either black or chrome depending on the artwork. If your bike has blackout pipes, wheels, and controls, adding a bright derby cover creates contrast. If you want a more unified, sinister build, keep the finish dark and let the image do the talking.
Pick Artwork With the Circle in Mind
Not every great image makes a great derby cover. A round part crops differently than a T-shirt, tank panel, or rectangular social post. The strongest designs have a clear main subject and enough breathing room around it to survive the circular format.
A skull, eagle, flag, badge, number, logo, or portrait can all look incredible when the important details stay near the center. Fine text around the outer edge can become hard to read. Tiny details may disappear once the art is resized. A full motorcycle photo can work, but it needs a strong focal point rather than a busy background filled with small objects.
If you are sending personal artwork, start with the best file you have. Original digital artwork is ideal. High-resolution photos can also produce a sharp result, especially when they are well lit and in focus. Screenshots, heavily compressed images, and photos pulled from old social posts can limit detail. That does not always make them unusable, but it changes what the final piece can realistically show.
Think about what you want someone to recognize in a split second at a gas stop. Your unit patch. Your dog's face. A memorial name. A weathered American flag. A phrase that sums up how you ride. The best custom art does not need a long explanation.
Ready-Made Graphic or One-Off Design?
Ready-made graphics are the fast lane when a design already feels like it was built for your bike. Dark Angel Reaper, Day of the Dead, Gunfighter, FAFO Skull, and We The People Flag-style artwork carries immediate attitude and works with the bold visual language many Harley riders already run.
A one-off design is for the rider who wants no duplicates in the parking lot. Personal photos, unit insignias, company logos, original art, names, and custom concepts can be turned into functional motorcycle parts. That kind of piece can be sentimental, rowdy, patriotic, funny, or flat-out intimidating. The only rule is that it should mean something when you thumb the starter.
There is a trade-off. A ready-made image is easier to choose because you can see the finished visual direction right away. A fully custom concept gives you more ownership, but it asks you to be decisive about the image, text, colors, and fitment before production begins. Made-to-order work is personal by nature, so take the time to get it right before placing the order.
Durability Is Part of the Statement
A derby cover lives in a rough neighborhood. It deals with engine heat, road grit, moisture, cleaning products, boots, and the constant vibration that comes with real miles. Decorative parts should not look great only under shop lights.
That is why the production method matters. Precision-machined parts provide the proper foundation, while a high-heat hard-coat imaging process puts full-coverage, photo-quality artwork onto the component itself. The goal is not a flimsy decal look. It is a durable finish built to keep its color and detail through the miles.
Still, ride smart and clean smart. Use motorcycle-safe cleaners, avoid harsh abrasives, and do not attack the cover with aggressive scouring pads. A quality finish is made for the road, not for abuse from the wrong cleaning tools. Normal care goes a long way toward keeping artwork looking as sharp as the day it went on.
Installation: Keep It Clean and Controlled
Installing a derby cover is a straightforward project for many riders, but straightforward does not mean careless. Work on a stable, cool motorcycle. Keep the area clean so grit does not fall into the primary when the original cover comes off. Have the correct gasket and tools ready before you start.
Loosen and tighten fasteners evenly, following the service information for your specific Harley model. Torque specifications vary by application, so use the factory service manual or trusted model-specific guidance instead of copying a number from a different bike online. Once installed, inspect the cover and gasket area after your first ride for any sign of seepage.
If you would rather not handle the install, a competent motorcycle shop can get it done without drama. The point is to finish with a cover that sits flat, seals correctly, and looks like it was always meant to be there.
Make the Bike Say Something
Your Harley already has a voice - the exhaust note, the stance, the miles on the odometer, the way it looks parked at the curb. A custom derby cover gives that voice an image.
At Custom Derby Cover, each piece is made to order for riders who are done with cookie-cutter parts and ready to run what they actually believe in. Choose the fitment carefully, bring an image with some fire behind it, and let the primary cover carry a message worth seeing every time you walk back to the bike.