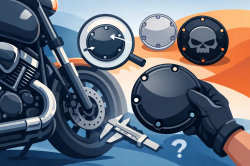
A derby cover might be one of the smallest parts on your bike, but get the fitment wrong and that killer artwork is going nowhere. Knowing how to identify derby cover fitment starts with recognizing where the cover lives, then matching your engine, model year, bolt pattern, and cover shape. Do that before you order, and your ride gets the personal statement it deserves - not a part that ends up on the workbench.
What a Derby Cover Actually Is
On most Harley-Davidson motorcycles, the derby cover is the removable cover on the outer primary case. It sits on the left side of the motorcycle when you are in the saddle, usually low and forward of the rider’s left foot. Its job is practical: it provides access to the clutch assembly and clutch adjustment area inside the primary.
Its other job is visual. The derby cover is right in the line of sight, which is why a full-coverage skull, flag, personal photo, unit logo, or original artwork hits so hard there. It is a small part with serious presence.
Do not confuse it with the timing cover. A timing cover is generally on the right side of a Harley’s engine at the cam chest, behind the cylinders. It is often smaller and may be round, oval, or shaped to follow the cam-cover housing. An inspection cover is another different part. It is usually a smaller cover on the primary and may sit nearby, but it does not provide the same clutch access as the derby cover.
How to Identify Derby Cover Fitment Before You Buy
The reliable answer is not just, “It looks round.” Plenty of covers look close in a photo. Proper identification comes from combining several details that narrow the part down to your exact platform.
Start with the engine family and model year
Your Harley’s engine family is the biggest piece of the puzzle. Big Twin, Twin Cam, Milwaukee-Eight, and Sportster models use different primary cases and derby-cover patterns across the years. Even two motorcycles that share a similar tank badge or frame style can require different covers.
Find your exact year, model, and engine before comparing products. Your owner’s manual, registration, VIN decoder, or factory documentation can help. Record the information as specifically as possible. “2016 Harley” is not enough. “2016 Street Glide with a Twin Cam 103” gives you something useful to match.
For example, a Milwaukee-Eight Touring bike and a Twin Cam Touring bike may both wear a big American V-twin and appear similar from ten feet away, but their primary-side details can differ. Sportster fitment has its own history too, especially between older Evolution Sportster generations and later 883/1200 models.
Find the cover on the primary side
Stand on the left side of your bike and look at the outer primary case. The derby cover is the larger removable cover in that area, held in place with several visible fasteners around its edge. Depending on the model, it may be a clean circle, a rounded shape, or a profile that follows the styling of the primary case.
If you are still unsure, look at the part’s relationship to the shift linkage and foot controls. The derby cover belongs to the primary drive side, not the cam chest on the opposite side of the engine. That simple left-versus-right check eliminates a lot of wrong orders.
Count the bolt holes, then count again
Bolt count matters because it determines whether the cover can physically mount to your primary. Five-hole and six-hole patterns are common on Harley platforms, but a number alone is not a complete fitment answer. The placement of those holes, the overall diameter, and the shape of the cover all matter too.
Count the fasteners around the cover’s perimeter. If you are looking at an installed cover, avoid assuming a missing screw means a lower bolt count. Verify every hole in the cover and compare the pattern to a product’s stated fitment.
As a general rule, many Twin Cam-era Big Twin derby covers use a five-hole pattern, while many Milwaukee-Eight applications use six holes. But “many” is not “all.” Harley production changes, special trims, aftermarket primaries, and previous owner modifications can change what is sitting on your motorcycle. Trust the bike in front of you and the confirmed model specifications over a guess based on an internet photo.
Compare the shape and dimensions
A round cover can still be wrong. Some derby covers have a nearly circular face, while others have flattened areas, offset edges, or a distinct profile. Look at the gasket line on your current cover. That outline is often more revealing than the artwork or chrome finish on its face.
If product specifications provide dimensions, measure your existing cover across its widest point. Use a tape measure for a rough check or calipers for greater confidence. Measure the face, not the mounting screws. Then compare the position of the holes relative to the outside edge.
This is especially useful if your bike has a custom primary, an older aftermarket cover, or unknown parts from a previous build. The year on the title tells the story of the motorcycle. The primary case tells the story of the part you need.
Check whether the primary is factory equipment
A custom bike can wear components from several eras. An aftermarket primary case, open-belt conversion, performance clutch setup, or engine swap can make stock fitment charts less dependable. If the cover you are replacing does not match the shapes you see listed for your model, do not force the match.
Look for manufacturer marks on the primary case and cover. Check service records if you have them. A quality photo of the left side of the engine, taken straight on with the cover and bolts clearly visible, is also valuable when confirming fitment before ordering.
Derby Cover vs. Timing Cover vs. Inspection Cover
These parts are often grouped together because they are all decorative engine covers, but they mount in different places and serve different functions.
A derby cover is the clutch-access cover on the outer primary. It is generally the larger canvas on the left side of the bike. A timing cover mounts on the cam chest side of the engine, usually on the right. An inspection cover is smaller and attaches to the primary case, often near the derby cover, for access to a separate service point.
That distinction matters when you are choosing artwork. A bold Dark Angel Reaper, We The People flag, or custom family image can be carried across matching covers, but each part needs its own correct fitment. Matching graphics do not make mismatched parts mount up.
A Fast Fitment Check Before Ordering Custom Art
Before you commit to the image that will set your ride off, take five minutes to confirm the details. Have your year, model, engine family, and current cover’s bolt count in front of you. Compare the overall shape to the listed application, and make sure you are shopping for a derby cover rather than a timing or inspection cover.
If your bike has had major drivetrain or primary work, add a photo check and verify the primary is factory style. This extra step is worth it because made-to-order parts are created specifically for the build you selected. Precision machining and a hard-coat finish can make the final piece take your breath away, but the foundation is always the right platform.
When Your Harley Is Not a Harley
The same identification process applies to Indian, Victory, and Suzuki motorcycles, with one major difference: never use Harley bolt-pattern assumptions for another brand. Locate the clutch or primary-side cover, identify the exact model and year, count mounting holes, and compare its profile to the stated application.
Motorcycle manufacturers can change cases and cover patterns within a model line, so the name on the tank is only the starting point. A correct part is vehicle-specific. That is what lets custom graphics look intentional instead of improvised.
Your derby cover is more than a service panel. Once you know exactly what you are running, it becomes a place to put your mark on the machine - loud, personal, and built to stay that way for the miles ahead.