
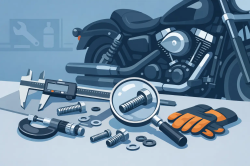
A custom cover should set your ride off, not leave you staring at a workbench with one screw that will not catch a thread. Before you measure Harley cover bolts, know which cover is coming off, keep every fastener organized, and measure the hardware that belongs to your exact bike. Harley-Davidson has used different platforms, cover depths, and thread specs over the years. Close enough is not a fitment strategy.
Why Harley Cover Bolt Measurements Matter
Derby, timing, inspection, horn, and cam covers may look like simple bolt-on upgrades, but each one sits against a specific mounting surface. A bolt that is too short may only grab a few threads. A bolt that is too long can bottom out before the cover is clamped, damage threads, or interfere with something behind the mounting point. Neither mistake belongs on a bike you take pride in.
The cover itself changes the equation. A precision-machined replacement cover can be a different thickness than the factory piece, especially when comparing a flat stock cover with a raised, recessed, or layered custom design. Decorative washers, trim rings, gaskets, and spacers also take up thread length. That is why the correct answer is rarely just, “Use the bolts from my buddy’s Softail.”
You are measuring more than metal. You are protecting the threads in your engine case, the finish on your new part, and the clean, finished look of the whole job.
Start by Identifying the Cover and Engine
First, name the part correctly. A derby cover mounts to the primary case. A timing cover mounts on the cam chest. An inspection cover is usually smaller and may share the primary area, but it does not necessarily use the same hardware as the derby cover. Horn covers, fuel doors, and console covers follow entirely different rules.
Then identify your engine family and model year. A Milwaukee-Eight touring bike, a Twin Cam Dyna, a Big Twin Evo, and an 883 or 1200 Sportster can have noticeably different cover dimensions and fastener requirements. Even within one engine family, Harley changed details across model years and trim packages.
If you are ordering a made-to-order decorative cover, select the fitment listed for your motorcycle rather than trying to force a universal-looking part onto it. Custom Derby Cover parts are built around defined applications because a killer graphic only works when the part seats correctly on the bike.
What You Need to Measure Cover Bolts
You do not need a full machine shop to get reliable numbers. A digital caliper is the best tool for measuring shank diameter and bolt length. A thread pitch gauge removes the guesswork when identifying threads. If you do not own one, a good hardware store can often help confirm a sample screw, but bring the original fastener with you.
A ruler is better than nothing for length, but it is not ideal for diameter or thread pitch. Avoid judging by eye, especially with small cover screws. The difference between common fractional sizes can be slight, while the result of choosing the wrong one can be a stripped mounting hole.
Before measuring, clean oil and road grime from the threads with a shop towel. Do not wire-wheel a plated or coated fastener just to make it shiny. You only need a clear view of the threads and a clean surface for the caliper jaws.
How to Measure Harley Cover Bolts Correctly
Remove one bolt at a time if the original cover is still installed. On a multi-bolt cover, lay the fasteners on a clean towel in the same pattern as the cover. They may all be identical, but do not assume it. Some applications use different lengths at different locations.
Measure the Thread Diameter
Close the caliper lightly across the outside of the threaded section. This is the major diameter, not the smooth shoulder under the head. Record the result in inches or millimeters, then identify the nearest standard thread size. Harley cover hardware is commonly specified in SAE sizes on many models, though exact specs depend on the component and year.
Do not force a metric bolt into a hole because the diameter appears close. A near match is not a match. Thread form and pitch matter just as much as diameter.
Measure the Thread Pitch
For inch-based hardware, pitch is expressed as threads per inch, such as 20 or 24. Use the thread pitch gauge against the bolt until the teeth nest perfectly into the thread valleys. There should be no rocking and no daylight between the gauge and the threads.
If you do not have a gauge, count the number of thread peaks in one inch with a ruler. That method can get you in the ballpark, but a gauge is more dependable. It also helps distinguish fine and coarse threads that can look almost identical in a quick glance.
Measure the Length From the Correct Point
For most cover screws with a pan, button, socket, or Torx-style head, measure from the underside of the head to the tip of the screw. Do not include the head height. The head sits outside the cover and does not enter the mounting hole.
Countersunk flat-head screws are the exception. Their heads sit inside the countersink, so length is measured from the top of the head to the tip. Measure the type you actually removed, not a random replacement screw from a parts bin.
Write the result as diameter, thread pitch, and under-head length. For example, your note may read: “Measure 0.250 inch, 20 TPI, 0.625 inch under head.” That gives you a useful starting specification without guessing from a photo.
Account for the New Cover, Gasket, and Washers
Once you have the factory bolt dimensions, compare the old and new cover thickness at the bolt holes. If the new cover is thicker by 1/8 inch, you may need approximately 1/8 inch more usable bolt length. If it is thinner, the original hardware may still work, but check that it will not bottom out before clamping the cover.
Gaskets matter too. A paper, rubber, or formed gasket is part of the stack-up. So are decorative washers. A washer can make a blacked-out bolt set look meaner, but it also reduces the amount of thread reaching into the case. Style is the point of customization, yet the hardware still has to do its job.
A practical check is to hold the new cover and gasket in place, then insert a bolt by hand. It should turn smoothly for several full rotations before it begins to snug down. If it binds immediately, stop. Cross-threading an aluminum case is a fast way to turn a simple garage upgrade into a repair job.
Check Bolt Head Style and Clearance
Length and threads are only half the story. The bolt head must fit the cover’s counterbore, recess, or exposed mounting area. A wide flange head may interfere with a recessed hole. A tall button head may stick out farther than you want. A socket head can be a clean choice, but make sure there is room to get the tool straight onto it.
For a cover with high-impact artwork, black oxide, stainless, chrome, or coated hardware can change the finished attitude of the part. Choose the look that belongs on your build, but never trade proper engagement for appearance. A bolt should seat squarely without chewing into the cover finish.
Also inspect the condition of the old screws. Rounded Torx drives, corrosion, stretched threads, and damaged heads are good reasons to replace hardware. Reusing tired fasteners on a fresh custom cover is like bolting a new paint job on with scrap-yard trim.
Install Without Wrecking the Finish
Start every bolt by hand. Run them in until each one is lightly seated, then tighten gradually in a crisscross pattern when the cover uses multiple fasteners. This brings the cover down evenly and reduces the chance of pinching a gasket or loading one side of the cover first.
Use the service manual torque specification for your exact motorcycle and cover. Cover fasteners generally do not need brute force. They thread into aluminum, and overtightening can strip the case, distort a cover, or squeeze a gasket until it leaks. A small inch-pound torque wrench is often the right tool for the job.
After a short ride, inspect the cover for seepage and make sure every fastener still looks seated. Do not keep tightening bolts just because you see a trace of oil. Diagnose whether the gasket, mating surface, or hardware length is actually the problem.
Your motorcycle does not need another generic piece hanging off the side of the engine. Measure carefully, choose the right fitment, and let the cover carry whatever image, flag, skull, logo, or personal artwork says something real about the rider in the saddle.