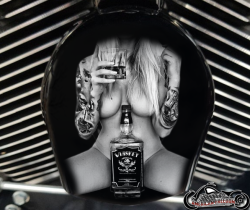
That stock horn cover is usually one of the plainest pieces on the front of a motorcycle. A custom motorcycle horn cover turns that overlooked hardware into a focal point - whether your bike wears an American flag, a snarling skull, military art, a memorial photo, or artwork nobody else on the road can claim.
For riders who have already put time into bars, pipes, wheels, paint, and performance, a personalized horn cover is not a random add-on. It is one more visible piece of the build. The right one pulls the bike’s attitude forward. The wrong one can look like an afterthought, or worse, fail to fit the horn assembly it was meant to cover.
Why a Horn Cover Carries More Weight Than Its Size
A horn cover is small compared with a tank or set of saddlebags, but it sits in a high-visibility spot. On many Harley-Davidson motorcycles, it is right out in the open, where the motor, frame, and rider’s eye line meet. That makes it prime territory for art that tells people exactly what kind of machine they are looking at.
Chrome has its place. So does blacked-out hardware. But generic finishes do not say much about the rider. Full-coverage graphics do. A We The People flag can sharpen a patriotic build. A Dark Angel Reaper design belongs on a blacked-out bagger with a mean stance. A photo of a fallen brother, a unit logo, a family name, or a piece of original artwork gives the bike a story that cannot be bought off a dealership shelf.
That is the real advantage of a custom part. It lets the machine look finished on your terms, not according to the same catalog page as every other bike at the local meet.
Start With Fitment Before You Pick the Artwork
The best image in the world does not help if the cover does not match your motorcycle. Horn assemblies vary by model, year, mounting position, and platform. Do not assume that a cover made for one Harley-Davidson Big Twin automatically works on a Sportster, or that a part for a Twin Cam fits a Milwaukee-Eight.
Before ordering, confirm the motorcycle’s year, make, model, and engine family. Then look at the horn location and the shape of the existing cover. Round horn covers may appear similar at a glance, but mounting points, depth, center openings, and surrounding clearance can differ. If your bike has an aftermarket horn, relocated horn mount, custom crash bar, or non-stock air cleaner setup, take a closer look. Those changes can affect clearance even when the bike itself is a listed fitment.
It also pays to inspect the stock piece before choosing a replacement. Note how it mounts, whether it uses a center fastener or perimeter hardware, and whether the horn wiring or bracket sits close to the cover. A made-to-order accessory deserves five extra minutes of checking. Custom parts are built for the rider who knows what he wants, so make sure the foundation is right before the artwork goes on it.
Match the Cover to the Rest of the Build
Fitment is mechanical, but visual fit matters too. A bright patriotic graphic can look killer against polished engine cases and traditional chrome. A skull, reaper, or Day of the Dead image often hits harder on a blacked-out street build. For a bagger with a lot of paint and pinstriping, consider artwork that supports the tank instead of competing with it.
Think about the colors already on the bike. Red, white, and blue graphics can carry an entire American-made theme. Black, gray, and bone tones keep a dark build aggressive without turning every component into visual noise. If your bike is loud in every direction, a clean logo or a single high-contrast image may make a stronger statement than another busy pattern.
What Makes a Custom Motorcycle Horn Cover Worth Ordering
There is a big difference between a graphic that merely sits on a part and artwork built to live on a motorcycle. A horn cover faces heat, vibration, weather, road grime, wash days, and the occasional careless boot or tool in the garage. The finish needs to look sharp beyond the first few rides.
Custom Derby Cover uses a high-heat hard-coat imaging process to apply full-coverage, photo-quality artwork to precision-machined motorcycle parts. That matters because the image is not treated like a temporary decal slapped onto a curved surface. The goal is a durable finish that holds its color and detail through the life of the bike.
High-resolution art is another piece of the equation. Small components expose weak artwork fast. Blurry photos, low-resolution screenshots, and compressed social-media images can lose detail when printed. If you are creating a one-off cover from a personal photograph or logo, start with the clearest original file you can get. A sharp source image gives the final piece the crisp lines, clean faces, and deep color that make people lean in for a closer look.
Ready-Made Art or Your Own Image?
Both routes can work. Ready-made graphics are the move when you want a proven design with instant attitude. A Gunfighter, eagle, flag, skull, or reaper theme gives the bike a hard visual identity without asking you to play graphic designer.
Personal artwork is for riders who want no duplicates. It could be a club emblem, business logo, military insignia, memorial image, tattoo-style illustration, pet photo, or a design you created yourself. This is where a horn cover stops being an accessory and becomes part of your bike’s identity.
There is a trade-off. Personal art takes more thought upfront. You need to choose an image that reads clearly at horn-cover size and works with its round or shaped layout. A full family photo may carry meaning, but a tightly cropped face, bold logo, or centered subject generally has more impact than a wide scene with tiny details. If an image matters, simplify the composition before shrinking it onto a motorcycle part.
Avoid the Mistakes That Make Custom Parts Look Cheap
The most common mistake is choosing artwork only because it looks good on a phone screen. The cover is a physical object, viewed from a few feet away, often in motion and in changing light. Designs with a strong center subject, decisive contrast, and defined edges usually win.
Another mistake is ignoring the bike’s finish. If every part is black, a black graphic with low contrast can disappear. If the bike is covered in chrome, a bright cover can look disconnected unless that color appears elsewhere. You do not need to match every component exactly, but the horn cover should feel intentional.
Finally, do not treat custom production like off-the-shelf shopping. A made-to-order part is produced after you select the design, size, and finish. That is what makes it yours. Confirm the details before placing the order, because a custom item built around your choices is not the same as grabbing a generic part and tossing it back in a bin.
Installation: Keep It Clean and Simple
Most horn cover swaps are straightforward, but work carefully. Let the bike cool, keep track of the original hardware, and avoid pinching or tugging horn wires while removing the old cover. Set the new cover in place without forcing it. If alignment is off, stop and check the part number, mount, and bracket rather than cranking down on a fastener.
Once installed, step back several feet. Look at the cover from the rider’s side, from the front, and at an angle. That small check tells you whether the artwork is positioned the way you want it and whether the new piece works with the rest of the bike’s stance.
A custom horn cover may be a small part, but it is a loud visual choice. Pick the right fitment, bring a design with something to say, and let that empty patch of stock hardware earn its place on the ride.