Your Harley’s Milwaukee Eight fitment is the difference between a cover that sets your ride off and a part that never makes it past the workbench. A wicked custom graphic means nothing if the bolt pattern, cover position, or engine family is wrong. Before you put your own image, club logo, flag, skull, pinup, or personal photo on a new cover, take a minute to identify exactly what is on the bike.
That is not boring paperwork. It is how you make sure the finished piece looks like it was built for your machine, because it was.
Why Milwaukee Eight Fitment Is Not One-Size-Fits-All
The Milwaukee-Eight is Harley-Davidson’s modern Big Twin engine platform, introduced on 2017 Touring models and carried into the redesigned 2018 Softail lineup. It has powered a long list of bikes in several displacements, including 107, 114, 117, 121, and beyond. Those numbers tell you engine size, but they do not automatically tell you which decorative cover belongs on your bike.
That is where riders get tripped up. Two bikes can both wear Milwaukee-Eight engines while using different primary cases, cover profiles, fastener layouts, or clearance requirements. A Road Glide, Street Glide, Fat Boy, Heritage Classic, Low Rider S, and CVO may share the Milwaukee-Eight name, but you should never assume every engine-side accessory crosses over without checking.
The smart move is to identify three things before ordering: your exact model and year, the specific cover you are replacing or dressing up, and the number and location of its mounting bolts. Those details beat guessing from an online photo every time.
Start With the Part, Not Just the Engine
“Milwaukee Eight” is a useful starting point, but it is not a complete fitment answer. The part location matters just as much as the motor underneath it.
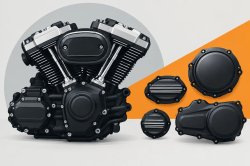
A derby cover sits on the primary side of the bike. It is the round or shaped cover riders often customize because it is highly visible when the bike is parked on the stand. A timing cover, sometimes called a cam cover in everyday shop talk, sits at the engine’s cam chest area. An inspection cover is a smaller piece associated with the primary assembly. They all have different shapes, depths, mounting patterns, and applications.
Do not order a derby cover because you meant to replace a timing cover. Do not select a timing cover because the artwork in the photo is mounted on a Touring bike that looks similar to yours. The artwork can be anything your heart desires. The underlying precision-machined part still has to match the exact location on your motorcycle.
If you are standing beside the bike, look at the existing cover first. Count the bolts. Note whether it is round, oval, or shaped with a distinct contour. Check whether the cover sits flush, has a recessed center, or needs clearance for nearby components. A clear photo of the installed part is one of the best references you can use when comparing fitment options.
Touring and Softail Milwaukee-Eight Models Need Separate Attention
The biggest fitment split for Milwaukee-Eight riders is often Touring versus Softail. Harley-Davidson gave both families the new engine platform, but the motorcycles were engineered around different chassis, drivetrains, and packaging.
Touring bikes include machines such as Road King, Street Glide, Road Glide, Electra Glide, and Ultra models. Softails include Fat Boy, Heritage Classic, Street Bob, Breakout, Sport Glide, Low Rider, and others. Model names can evolve from year to year, and special editions can add another layer of difference. That is why “I have a 114” is not enough information to confidently choose a cover.
For example, an engine displacement upgrade does not necessarily change the decorative cover fitment, while a change in model family, year, or primary configuration might. Conversely, two bikes from the same family can accept the same cover even when one has a larger factory engine. The part’s physical interface decides it, not the badge on the air cleaner.
Later-model performance and CVO machines deserve an extra look. Factory changes, upgraded components, and model-specific engine packages can affect what belongs where. If a bike has been modified with an aftermarket primary, cam chest component, or custom engine case, stock fitment charts may no longer tell the full story.
The Four Checks That Prevent a Bad Order
Made-to-order parts are built around your selection, so use a quick fitment check before artwork goes into production. It takes less time than boxing up a part that does not belong on the bike.
- Confirm the year, model, and engine family. Use the title or registration, then verify the motorcycle itself. Previous owners and dealership listings are not always precise.
- Name the cover location. Decide whether you need a derby cover, timing cover, inspection cover, horn cover, fuel door, or another part. Each is its own application.
- Compare the bolt count and spacing. Count the fasteners on the existing cover and compare their placement, not just the total number.
- Look for non-stock parts. Aftermarket primaries, performance cam chests, custom cases, and conversion work can change fitment from the factory setup.
If you are unsure, do not force a guess. Pull up a close, well-lit photo of your current cover, including the bolts and the edge of the surrounding case. That one photo can reveal more than a long description of the bike.
Fitment Protects the Finish and the Look
A cover that technically bolts on but does not sit correctly is not a win. Poor alignment can create uneven pressure at the gasket surface, interference around the case, or a finish line that looks off against the rest of the bike. Your custom cover should look planted and intentional, not like it was made to “almost” fit.
That matters even more when the art is the point. Full-coverage, high-resolution imaging has a way of pulling attention straight to the primary or cam chest. A dark angel, We The People flag, gunfighter scene, old-school pinup, or a personal photo deserves a clean frame. Precision machining gives the design the proper foundation, while a high-heat hard-coat finish is built to keep the color and detail looking sharp through heat, road grime, wash days, and miles.
A cheap sticker look belongs nowhere near a bike you have put real time into. The whole purpose of a custom cover is to make a statement without surrendering the hard-part credibility your Harley deserves.
Common Milwaukee-Eight Fitment Mistakes
The most common mistake is ordering by engine displacement alone. A 107, 114, or 117 tells part of the story, not the entire story. The next mistake is treating every round cover as interchangeable. Similar diameter does not guarantee matching bolt holes, sealing surfaces, or depth.
Another trouble spot is confusing model year with production year. A bike purchased late in one calendar year may be titled or marketed as the following model year. Always go by the actual Harley model year and model designation when possible.
Riders also run into problems after modifications. A stock 2020 Softail is straightforward. A 2020 Softail with a performance primary, a different clutch setup, a replacement cam cover, or a custom-built engine requires fitment based on what is physically installed now. The same rule applies to bikes with parts swapped after a tip-over or repair.
Finally, do not assume a cover fits because a friend has one on a similar bike. Similar is not the same. Compare the real part on both motorcycles before spending money on custom art.
Make Your Milwaukee-Eight Yours
Once the fitment is nailed down, the fun starts. Your derby or timing cover is one of the cleanest places to put your mark on a Milwaukee-Eight. It is visible, functional, and far more personal than another catalog part everybody at the gas station already has.
Custom Derby Cover builds made-to-order pieces for riders who are done with cookie-cutter hardware. Bring the patriotic artwork, the outlaw graphics, the memorial image, the business logo, the family photo, or the design nobody else has the nerve to run. Just make sure the foundation is right first.
Before you place the order, walk back to the bike one more time. Read the model information, look at the existing cover, count the bolts, and confirm the part location. A few careful minutes now lets you ride away later with a custom piece that fits hard, looks right, and says exactly what you want it to say.